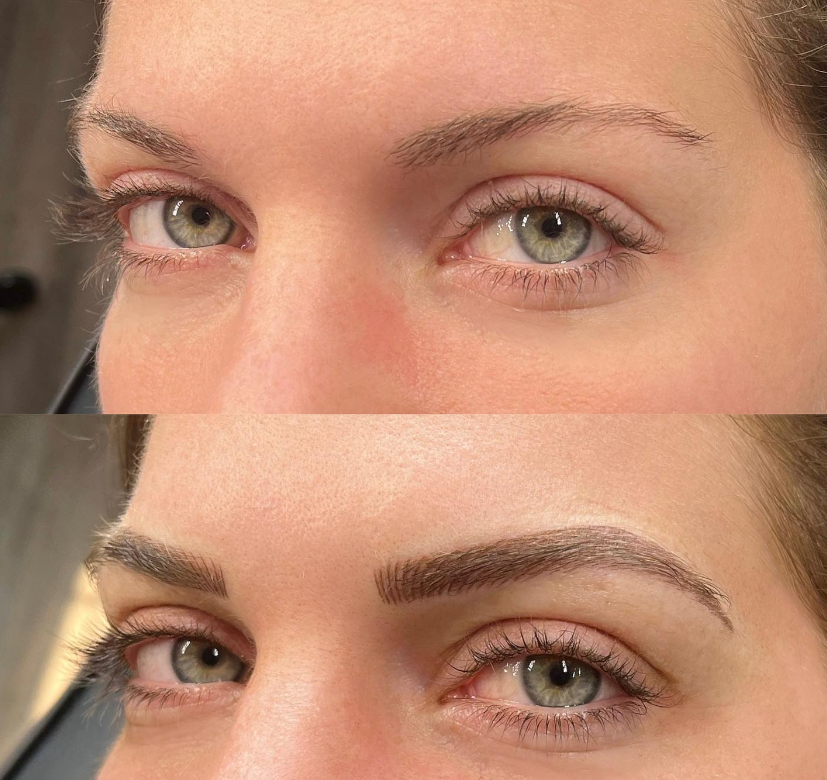
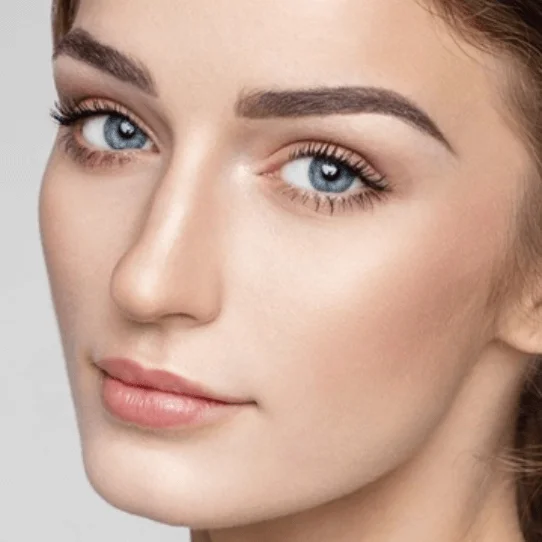
Nanoblading has emerged as a popular semi-permanent makeup technique for achieving natural-looking and defined eyebrows. While the initial procedure is important, the healing process that follows plays a crucial role in the final outcome. Understanding the nanoblading healing process and following proper aftercare instructions are essential for obtaining optimal results.
What is Nanoblading?
Nanoblading is an advanced form of microblading that involves using a specialized tool with tiny needles to create fine, hair-like strokes on the eyebrows. The procedure aims to enhance the eyebrows’ shape, fullness, and symmetry, resulting in a natural and long-lasting appearance. Unlike traditional tattooing, nanoblading uses pigments designed to fade over time, allowing for adjustments as the client’s preferences change.
Nanoblading Healing Process
The NanoBlading healing process is an essential phase during which the brows gradually evolve, revealing their true beauty. Understanding this process is paramount to managing expectations and ensuring the longevity of the results. From the immediate aftermath of the procedure to the final touch-up session, each stage plays a vital role in the overall healing and appearance of the brows.

Nanoblading Healing Process Day By Day
Day 1:
Immediately after the nanoblading procedure, your eyebrows may appear darker, more defined, and more intense than the desired final result. The pigment will initially appear sharp and crisp. The treated area may feel slightly tender or sensitive, similar to a mild sunburn.
Day 2-3:
The treated area may start to feel slightly itchy as the healing process begins. It is important to resist the urge to scratch or pick at the eyebrows, as this can disrupt the healing process and potentially lead to infection. The colour of the pigment may start to soften and lighten slightly.
Day 4-5:
You may notice that the brows start to form small scabs or flakes. This is a normal part of the healing process as the top layer of skin naturally sheds to reveal the newly implanted pigment underneath. It is crucial to avoid picking, peeling, or scratching the scabs to allow for proper healing.
Day 6-7:
The scabs and flakes on the eyebrows may continue to shed, and the colour will start to appear lighter than immediately after the procedure. The brows may look patchy or uneven as some areas of pigment may have faded more than others. This is normal and part of the healing process.
Day 8-10:
Most of the scabs and flakes should have naturally fallen off by this point. The colour of the pigment will continue to lighten, and the brows may appear softer and more natural. Some areas may still look slightly patchy or uneven. It is important to continue avoiding activities that can cause excessive sweating, moisture, or friction on the eyebrows.
Day 11-14:
The healing process is well underway, and the brows will start to take on a more natural appearance. The colour will continue to settle and develop, gradually reaching its final shade. Any remaining patches or unevenness should continue to improve.
Week 2-4:
The colour of the pigment will continue to fade and soften during this period. By the end of the fourth week, the final colour should be more apparent, and the brows will appear more natural. It is important to keep following the aftercare instructions provided by your technician, such as avoiding prolonged sun exposure, using sunscreen, and avoiding harsh chemicals on the treated area.
Touch-up appointment (4-8 weeks):
You will typically have a follow-up appointment with your technician around this time. They will assess the healed results and make any necessary adjustments or touch-ups to ensure the desired outcome is achieved. This appointment helps to refine the shape and colour of the eyebrows.
How Long Does Nanoblading Healing Process Last?
The healing process of nanoblading typically spans 4 to 6 weeks, during which the treated area gradually undergoes various stages of healing and transformation. While individual experiences may vary.

Nanoblading Healing Process Stages
The healing stages of nanoblading generally follow a similar pattern to other forms of microblading. Here are the typical stages of healing after a nanoblading procedure:
- Swelling and redness, strokes appear darker than desired.
- Scabbing occurs.
- Scabs peel and flake off, revealing lighter pigment underneath.
- The gradual return of color may appear patchy.
- The touch-up session was followed by a milder recovery cycle.
- Full recovery achieved.
What Can I Expect During The Nanoblading Healing Process?
To ensure proper healing, prevent infection, and achieve the desired results, it’s important to follow an aftercare routine during the initial stages of the nano brows healing process.
Please keep in mind that the final form and colour of your brows will take approximately 4-6 weeks to fully develop after the treatment. Every individual’s skin retains pigments differently, so it’s normal to see some lighter patches during the healing process. These patches can be addressed and corrected during the touch-up session. Initially, the pigments may appear too dark, but as scabbing occurs and fades, they will gradually darken to the desired shade.
The physical symptoms experienced during the healing process are generally mild. Immediate skin reactions can be expected on the first day, and you may notice some scabbing and flaking as the tiny cuts close up. Once these external signs subside, it will take a few more weeks for the internal healing of the tissue to be completed.
Nanoblading Aftercare
- Keep the treated area clean: Gently clean the treated area with a mild, fragrance-free cleanser or the recommended aftercare product provided by your technician. Use clean hands or a cotton pad/ball to avoid introducing bacteria. Avoid rubbing or scrubbing the area.
- Avoid water exposure: For the first few days after the procedure, avoid direct water exposure to the treated area. This includes activities such as swimming, saunas, hot tubs, and excessive sweating. Water can interfere with the healing process and potentially cause the pigment to fade or become patchy.
- Apply a healing ointment: Your technician may recommend applying a thin layer of a specialized healing ointment or balm to the treated area. Follow their instructions on the frequency and duration of application. This helps keep the area moisturized and promotes healing.
- Avoid picking or scratching: It is crucial to resist the urge to pick, scratch, or peel the scabs that form during the healing process. Allow the scabs to naturally exfoliate and fall off on their own. Picking at the scabs can lead to pigment loss and scarring.
- Avoid makeup and other beauty treatments: Avoid applying makeup or other skincare products directly on the treated area during the initial healing stage. This includes avoiding eyebrow makeup or brow grooming treatments. Let the area heal and avoid any potential irritation or infection.
- Protect from sun exposure: After the initial healing period, protect your nanobladed eyebrows from excessive sun exposure. UV rays can cause the pigment to fade or change in colour. Wear a hat or use sunscreen with high SPF to shield the area from the sun.
- Avoid exfoliants and harsh chemicals: Refrain from using exfoliating products, harsh cleansers, or chemical peels on or around the treated area. These can disrupt the healing process and affect the longevity of the pigment.
Nanoblading vs Microblading
Microblading and Nanoblading are terms often used interchangeably to describe the same cosmetic tattooing technique. Nonetheless, certain practitioners and manufacturers might employ the phrase “nanoblading” to designate a distinct variation or an enhanced version of microblading. Here are the overall disparities between the two:
- Nano Brows use a finer tool, while Microblading utilizes an ultra-fine row of needles in a handheld tool.
- Nano Brows are more precise due to the tool used.
- Nano Brows are slightly less uncomfortable than Microblading as they cause less trauma to the skin.
- Nano Brows tend to heal faster compared to Microbladed brows.
- Nano Brows have a longer lifespan than Microbladed brows. With regular touch-ups, microbladed brows typically last 1-2 years, while Nano Brows can last up to 3 years.
How Long Does Nanoblading Last?
Nano brows have a longer lifespan compared to microblading, lasting around 2-4 years. However, it’s important to schedule touch-up appointments every 12-24 months to maintain the longevity of the nano strokes. Prudent maintenance is vital, encompassing the application of sunscreen and shielding the eyebrows from sunlight.
It’s imperative to exercise caution with skincare products containing vitamin A, Retinol, hyaluronic acid, or glycolic acid, as these substances can expedite the fading of the pigment. Individuals with oily skin or very active lifestyles, involving frequent sweating, may experience faster fading, necessitating more frequent touch-ups. On average, clients can expect their nano brows to last 6-12 months longer compared to microblading.

Nanoblading Healing Process-Takeaway
The nanoblading healing process is a crucial aspect of achieving the desired results of this revolutionary eyebrow enhancement technique. While Nanoblading offers numerous benefits, including enhanced eyebrow shape and symmetry and long-lasting results, the healing process plays a critical role in ensuring that these benefits are realized.
Individuals who undergo Nanoblading must be diligent in following the aftercare instructions provided by their technician, including avoiding common mistakes, maintaining hygiene and cleanliness, staying hydrated and following a healthy lifestyle. By doing so, they can minimize the risk of complications and achieve the best outcome.
Moreover, regular touch-up sessions and recommended aftercare routines can help maintain the longevity of Nanoblading results and preserve the natural-looking appearance of the eyebrows.
FAQ’s
1. Can I Apply Makeup On My Healing Nanobladed Eyebrows?
It is recommended to avoid applying makeup directly on the healing Nanobladed eyebrows during the initial healing phase. The use of makeup products can introduce bacteria and hinder the healing process. Once the eyebrows have fully healed, you can resume applying makeup as desired, taking care to avoid excessive rubbing or scratching.
2. How Long Should I Wait Before Getting My Eyebrows Wet During the Healing Process?
To ensure optimal healing, it is generally advised to avoid excessive moisture, including prolonged water exposure, for the first few days after Nanoblading. This means refraining from swimming, hot showers, or excessive sweating. Nevertheless, it’s advisable to adhere to the particular directions given by your technician, as they might offer customized recommendations depending on your skin complexion and the precise method employed.
3. What Should I Do If I Notice Any Signs of Infection or Complications During the Healing Process?
While infections and complications are infrequent, it’s vital to remain vigilant for any atypical indications. It’s imperative to promptly contact a healthcare provider if you observe severe redness, notable swelling, the development of pus, or experience a high fever. Seeking medical attention promptly will help ensure a speedy recuperation as they can assess your situation and provide suitable treatment. Contact your technician or a medical professional for guidance and appropriate treatment.
4. Can I Exercise or Engage in Physical Activities During the Healing Process?
While it’s important to avoid excessive sweating during the initial healing phase, light exercises that do not cause excessive sweating are usually acceptable. However, it’s crucial to avoid any activities that could cause direct trauma to the eyebrows or disrupt the healing process. Consult your technician for personalized recommendations based on your specific circumstances.
